Monday, March 26, 2012

French Twist

There is something great about getting your nails done. I always feel polished, primped and pampered afterwards.

French manicures are my all time favorite but I do occasionally shake things up a bit like when I went all out for Valentines day.

This time I went with a French mani but jazzed it up with a touch of sparkle!


Happy Monday Everyone :)


Saturday, March 24, 2012

Ruby Red Coffee Table


Lets talk coffee tables! Here is my inspiration...


I love that this coffee table has storage! Also the legs are super cute!!!

A little background info for ya'll:

Trey and I are in college so naturally we have a lot of mismatched hammy down furniture. We had one coffee table in the living room that had a light wood top with green chunky straight legs that wasn't really my style, but very sturdy. Another coffee table was in the garage that was actually almost on its way to the trash because in the process of getting it home from my sister's the bolts to the legs had been misplaced. It had an iron base with swirly scrolls and curvy legs, but had a weird plastic faux marble top that was just too dark for the living room. But, in the effort to use what we have and stay on our low low budget,  I decided by attaching the wooden top and the iron base of the other coffee table and together they would form a new fabulous coffee table. Made easy on the eye with spray paint of course!

So Trey and I got to work! I disassembled both coffee tables and then reattached the wooden top to the iron base. 

Sorry for the grainy phone pic but this is my only before shot... 


After that we used a power sander and lightly sanded the top of the table to rough it up a bit. Next step was to wipe it down and the spray prime it with Zinsser spray primer. After several light coats we attacked it with red spray paint!!! The color is Banner Red by Krylon. It took ten million coats even though we primed and was an all weekend project, but in the end it was totally worth it. Dontcha think?


We love it! (or I love it and he likes it haha) I love how it is so bright against the darkness of the couch! (Aren't throw pillows so annoying!? I love them, but I can never get them to stand up straight/photograph right)

What are you guys up to this weekend? Any furniture painting in the works? Find any inspiration on Pinterest? Anyone join in the fun with Cassie, Sherry, Katie, and Erin in the Pinterest Challenge Winter Edition?


Pssst! Pinterest does not sponsor this blog in any way shape or form. You know besides taking up all my spare time and giving me a vast amount of inspiration!  

Tuesday, March 20, 2012

Hey Now... Just Relax!

Don't we all need a reminder ever once in a while to just relax?

My second project for the Pinterest Challenge Winter Edition was to make a banner that is a daily reminder to slow down and just relax. My inspiration for this project is the same shop as the chalkboard labels. I highly recommend Blue Pearls, they make beautifully rustic yet super elegant decor. 

I wanted to challenge myself even more by not spending a dime on this project. So the first thing I did was look at all the crafting stuff/paint I had and assemble a cohesive group of materials. I gathered some burlap, red ribbon, and mixed two paints together to get a bluey green tealish color. 

There aren't any during/process pictures! Shame on me!!

Heres the run down though:

First I cut out a template, then traced five shapes and cut each shape out. (Burlap is tricky tricky business to cut, but just go slow). After everything was cut out I put a piece of paper under each burlap shape and went to work free handing the letters. This is a tricky part also because my R is a teensy bit smaller than my ELAX. But in the world of DIY/crafting nothing is perfect so I just rolled with it. After every letter is dry, string the ribbon through the burlap, but be careful not to make the hole too close to the edge or the burlap will fall apart. I chose not to make holes with a hole punch, I just simply moved the burlap fibers until there was an opening big enough to string the ribbon through. Also, I didn't secure each letter with a knot in the ribbon because they seemed to be staying fine and I wanted to be flexible with the placement later.

Here are some close ups...


... Don't judge my smudges on the mirror, its antique! (mom) haha 

Can't wait for the Pinterest Challenge Spring Edition! 


Pssst in no way did Pinterest sponsor this project or this blog. Just a girl who likes to get crafty with her blog friends!

Monday, March 19, 2012

Chalkboard Labels

I'm late to the game, but for the Pinterest Challenge Winter Edition I decided to try my hand at making some really cute chalkboard labels that I saw on... you guessed it... Pinterest. You can buy the originals here. 

I found some packages of chip board recipe cards in the dollar bins at Michael's that were perfect. I highly recommend that you start looking there first if you want to duplicate this project or really anything! The originals are a lot more detailed with brads and perfectly distressed edges. Truly beautiful! 


I needed a quick fix so I decided to whip up my own version.

Step 1: Make a template. I used this shape. Yes, that is a paper towel! haha


Step 2: Trace all the templates on to the chip board.
Step 3: Cute the shapes out.
Step 4: Tape off a square using painter's tape, but be careful to only press down on the inside of the square because if the tape touches the edge of the chip board then it rips the layers apart.
Step 5: Spray paint 3-4 light layers or until solid black. (on some of these the paint bled through)


Step 6: Let dry then rub chalk all over the chalkboard paint to condition.


Step 7. Wipe clean (I wouldn't use a wet cloth, I just used a foam brush) and scribble away!


Aren't they so cute? What makes these chalkboard labels truly amazing is the fact that it only cost me three dollars to make twelve of them! I have to clarify that I used painters tape and some chalkboard spray paint that I already had (Michael's dollar bin chip board recipe cards = 3 dollars). I am going to use them to label the baskets that are above the cabinets in my kitchen. When I finally get that situation under control (I still need to add three more baskets) I'll post some after pics for ya'll! 


From Gangly Gallery Wall to Superb Shelving

My first attempt to display some photos was a fail. It ended up looking mismatched in all the wrong ways and never felt finished to me.


So one night I was so sick of looking at it that I took most of the frames off the wall before I even had a plan. I was a girl on a mission! First stop.. find inspiration!

So I came across two different sources...


This first picture is from here and I came across it awhile back but just love how it anchors the wall. Also what a great way to showcase some items you love!

Now my second source of inspiration is a little weird for a living room because its obviously a kitchen...


This kitchen is from Young House Love which Sherry and John completely DIYed themselves! If you haven't been over to YHL to check it out seriously put it on the to do list! They are DIY heros! 

Still both of these examples capture what I was looking for most.... the ability to display not only pictures, but cute trinkets and flowers too! 

So off I went to Hobby Lobby to take another look at some shelves that I had been eyeing for about a zillion months! With a gift card in hand I walked out of Hobby Lobby with a huge smile on my face and four new tin shelves!

Now the dilemma was how to hang them so that they made sense. I already had picked out the wall behind the couch because it looked like one massive stripe of couch and one blaring blank white wall. 


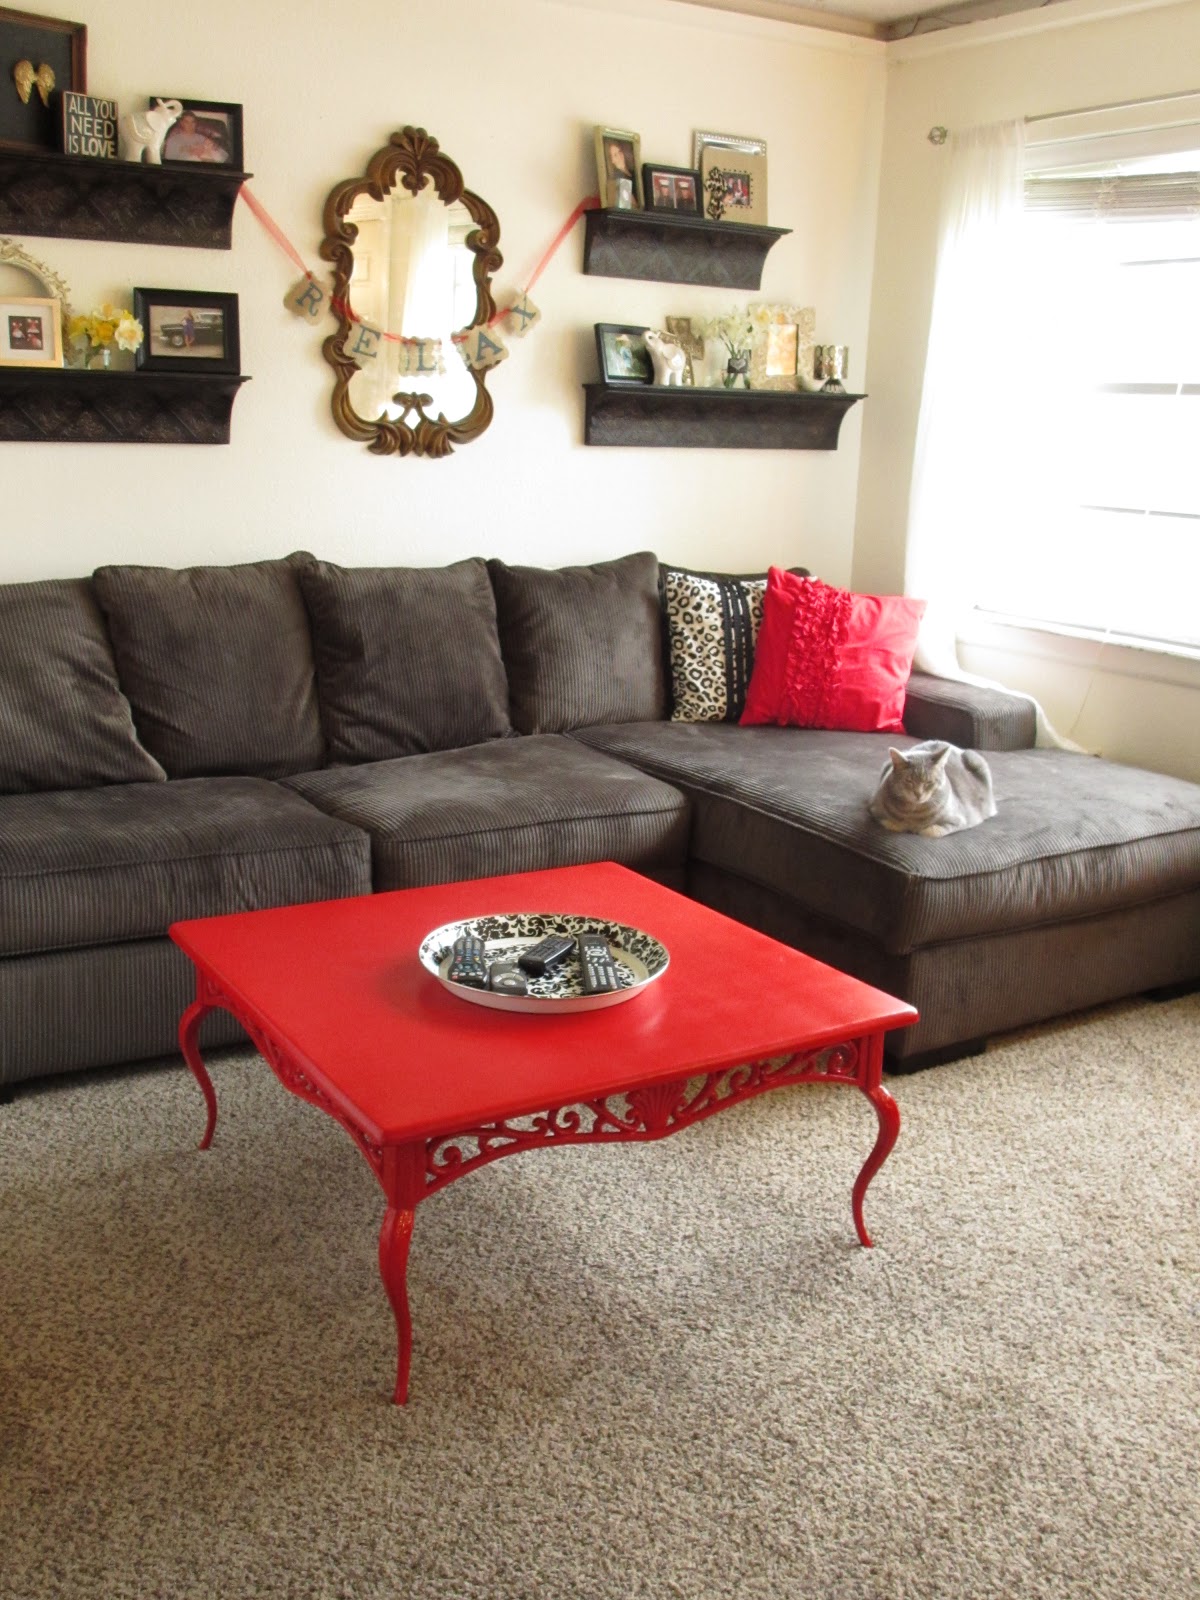
My jumping off point was to hang a mirror directly in the center of the wall. 


Then I employed Trey's help with hanging the shelves. Since we weren't positive where the studs were in the wall, we used plastic anchors to get a more stable hold and found a few studs along the way! 


After two hours of measuring, eyeballing, drilling, and a dinner break we finally had the shelves up! This is my first round of styling them. They look a little different now and yes that is a halo of light at the top of the wall... a boy creation if I ever saw one :) Our living room and kitchen are horribly lit and this was Trey and his brothers solution... ohh boys! haha 


Here are some close up shots of the shelves. 


Ignore all the dates in the photos, I'm still learning on how to use my camera and sometimes the date pops up and sometimes it doesn't! Ah! Mysterious camera settings! 

Well I hope you guys like! I know I'm smitten! 


Anyone try their hand at open shelving? Or find another cool way to display the things you love? What about finally figuring out your camera settings? Anyone have a cannon power shot ELPH 310 HS? Tell me about your Monday!